By Rosalind Rei
Plants have a startling ability to regenerate. Remove a leaf and a new one will grow in its place. A piece of stem can form its own root system within a matter of weeks. Gardeners take advantage of this endless capacity for growth using a technique known as cloning. This is where you cultivate a whole new plant using small pieces of stem or leaf, known as cuttings.
Cloning might sound technical but it’s very easy to master. All you need are scissors, water, and sometimes potting medium for your cuttings to grow in.
Why Clone Plants?

For starters, it’s far easier to make new versions of your houseplant through cloning than it is to harvest seeds from it and cultivate from scratch. Encouraging houseplants to seed is very difficult, because most only flower in their wild habitats. Cuttings are also more robust than seedlings, which maximizes your chances of achieving a fully grown healthy plant.
There’s also a social element to propagating. Package up your plant babies in a nice pot and you’ll have a home-grown gift for loved ones. If you can make free copies of expensive botanical rarities, you can exchange them over plant swaps and expand your collection.
Another benefit of cloning is that the propagated plants will always be identical to the original in every way. This is because cloning is an asexual form of reproduction. It doesn’t involve mixing the genes from two different plants, which happens when plants cross-pollinate to produce seeds.
When to Clone your Plants
Your cuttings are much more likely to root in spring or summer when plants are actively growing. If you are lucky enough to live in a tropical climate with sunshine and warm temperatures year-round, you can propagate at any time.
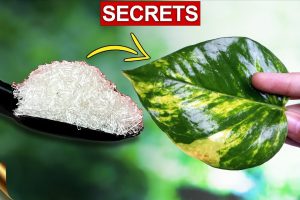
Can Keiki Paste Help with Propagation?
The cuttings you take should be healthy, green, and supple. These indicate young, actively growing areas that produce roots much more readily than mature, woody parts.
If your plant does not have many young shoots, you can encourage it to grow new ones with Keiki paste. Keiki Paste is a sticky paste that contains natural plant growth hormones that encourage your plants to put out additional vegetation. It can give you a bigger plant with lots of young stems, ideal for taking cuttings.
Keiki paste must be applied to the stem nodes, which are the only parts where leaves, stems, and flowers grow from. On most plants, stem nodes look like joints or bumps that mark the stem every couple of inches.
Below, you can see some stem nodes on a Tradescantia and a Philodendron. On the Tradescantia, you can see two of the nodes already sprouting a new stem and leaf.


Once you have identified the nodes where you want new shoots to appear, score them very lightly with a sterilized needle or knife. Then, dab a tiny amount of Keiki paste on the wound with a Q-tip.

If you provide sunny conditions, a regular watering regime, and enough fertilizer, new shoots will appear from the treated nodes in 4 to 8 weeks. Once they are about 2 inches in length, you can snip them off as cuttings. Remember that Keiki paste tends to work better on nodes that are nearer to the soil.
Never apply Keiki Paste to the ends of cuttings. Although its hormones stimulate new leaves, stems, and flowers, they inhibit root growth.
How to Clone your Plants from Cuttings
Step one: Taking Cuttings
First, identify which plant parts you will take as cuttings. Some species will only root from stems, others from leaves, and others only from leaves attached to their petioles (stalks).
Always use a sterilized knife or scissors for taking cuttings.
Plants that propagate from stem cuttings

English ivy, Camelia, azalea, tradescantia, monstera/swiss cheese plant, pothos, yucca, begonia, crown of thorns, jewel orchid, string of pearls, philodendron cordatum
Many houseplants can be propagated from stem cuttings. However, not every part of the stem will work. You will need to cut a 2-to-4-inch stem piece just below a stem node, which often look like joints or bumps. Make sure the cutting has two or three leaves attached. Make the cut at an angle of between 30 to 45 degrees. Then, cut off half of each leaf.
Plants that propagate from leaf with petioles

African violet, peperomia, episcia, ZZ plant, hoya
Some plants propagate from leaves attached to their petiole. Petioles are the tiny stems that join leaves to the stem on certain plants.
You should cut the petiole right where it meets the stem. Snip it off at an angle of between 30 to 45 degrees and then cut the leaf in half.
Plants that propagate from leaves or leaf sections
Kalanchoe, sedum, echeveria

Some plants can be propagated from whole leaves or, less commonly, cut sections of leaves (Sansevieria trifasciata, rex begonia). For these, you do not need to include the petiole. This is probably the easiest kind of cutting to take.
Many succulents are propagated from their fleshy leaves. In this case, let the leaves sit on a dry surface for a couple of days before inserting them into the potting material.
Step two: Prepare your Cuttings
You can help your cuttings along by dipping the cut end in a root-stimulating substance. Some gardeners swear by ground cinnamon and honey. You could also opt for plant rooting hormone powders from garden stores.
This step is optional, but it will increase the chances that your cuttings will root.
Step three: Insert the cuttings into a propagation medium
Next, you must prepare a propagation medium – the material that the cutting will root inside.
There are different mediums that you can use. Straight soil is the most obvious but there are better options. Let’s start with water, as this is the easiest to prepare.
- Water in a jar
The simplest way to water-propagate cuttings is to simply pop the cuttings into a small jar of water. However, results can be unreliable.
- Water and clingfilm
A more reliable way to water-propagate is to fill a shallow tray halfway up with water, cover it in tight clingfilm, and poke small holes in the clingfilm with a needle.
Insert the cuttings carefully into the holes, making sure the ends are dangling just above (not touching) the water.
You can also use a solid propagation medium.
- Soil and sand
Mix two-parts coarse horticultural sand with one-part ordinary houseplant soil. Place the mixture in a small pot or tray and pop the cutting in, cut-end first.
Keep the soil slightly moist until roots appear, but never soaking wet.
- Perlite
Perlite is another good propagation medium. These are just crushed pieces of white volcanic rock that have a popcorn-like lightness and texture.
Just fill up a pot or tray with the stuff and put your cuttings in.
Keep the perlite slightly moist by running it under a tap every week or so.
- Sphagnum moss
Another good option is sphagnum moss. Simply fill a small pot or tray with the stuff and put your cutting in, cut-end first. Keep the moss slightly damp until the roots appear.
Step four: Position your Cuttings
Finally, you need to find a sunny spot for your cuttings. Too much intense sunlight however will scorch your little friends. A sunny south, west or east-facing windowsill with a sheer curtain would work.
Now wait. This requires some patience, especially if you are using a solid medium where it’s impossible to check your cuttings without lifting them out. Resist the temptation to disturb your plants during the first month.
Step five: Repot
Watching brand new white roots peek out from your cuttings after weeks of waiting is one of the most satisfying gardening experiences. This will take between 4 to 12 weeks.
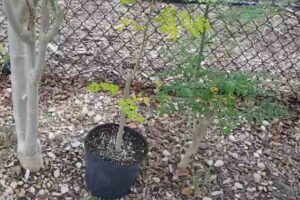
Once the roots are around 3 inches long, transfer the cutting into its first pot. Choose a pot only two inches wider than the diameter of your cutting and plant it in a soil mixture that is appropriate for its species.

Above is a Money Plant that I propagated in a spice jar filled with water, applying cinnamon powder to the cut node. The roots are now long enough that the cutting is ready to pot. It took around 3 months on a shady west-facing window for the cutting to reach this stage. The process would have been much quicker had I placed it in a sunnier place.
Rosalind Rei is a contributing writer for Southside Plants which creates high-tech accessories that make growing and keeping houseplants easy. Our fans are energetic, high-demographic, rabid houseplant lovers…of every level and gender. They gush about each leaf, cry over plant pests and have large plant wish lists. And we are obsessed with their success.
The post 5 Easy Steps to Successful House Plant Cloning appeared first on Gardening Channel.
")


")